// the setup function runs once when you press reset or power the board
void setup() {
  // initialize digital pin LED_BUILTIN as an output.
  pinMode(LED_BUILTIN, OUTPUT);
}

// the loop function runs over and over again forever
void loop() {
  digitalWrite(LED_BUILTIN, HIGH);   // turn the LED on (HIGH is the voltage level)
  delay(1000);                       // wait for a second
  digitalWrite(LED_BUILTIN, LOW);    // turn the LED off by making the voltage LOW
  delay(1000);                       // wait for a second
}
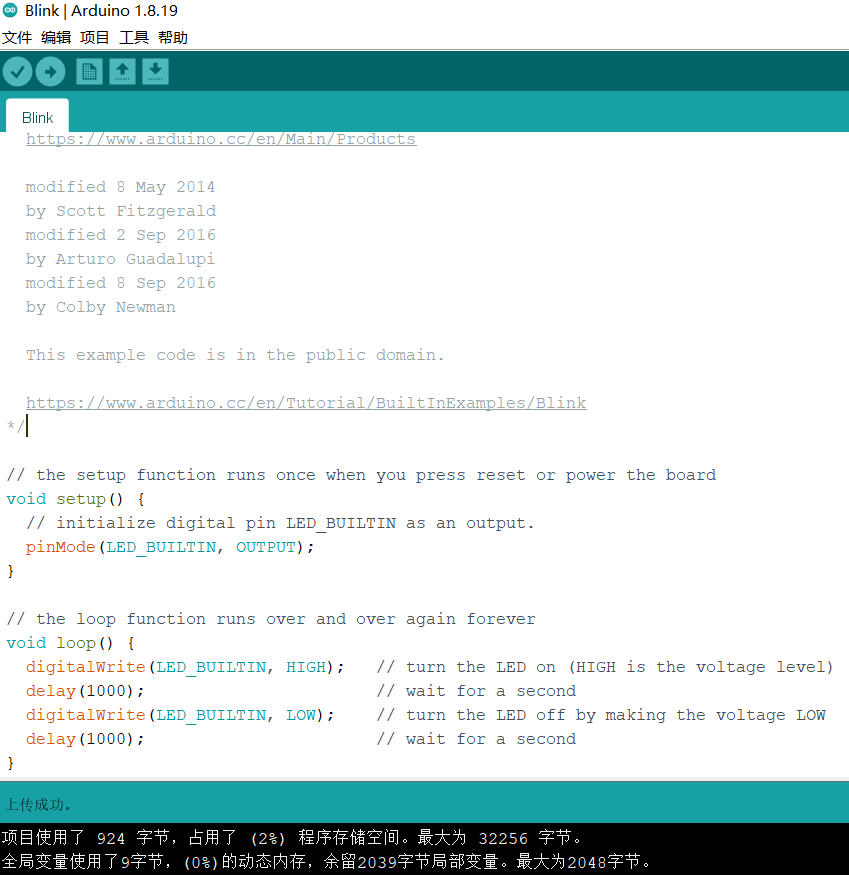
这样看起开非常简单,这根学习STM32单片机完全不一样,可能大家一听你是玩Arduino的就觉得那玩意太垃圾了。其实想这个单片机也有高大上一点的玩法。
二、AVR单片机IO操作步骤
在玩AVR的ATmega328P之前先了解一下AVR单片机。AVR的IO端口是标准的双向口,在复位时所有端口处于高阻态,AVR的每个端口对应三个寄存器,即DDRx,PORTx,PINx。在使用AVR单片机之前,一定要根据引脚功能对相应的端口初始化,否则,端口很可能不能正常工作。当单片机的引脚作为通用数字I/O口使用时,每个引脚都具有3个寄存器位:DDRxn、PORTxn、PINxn。
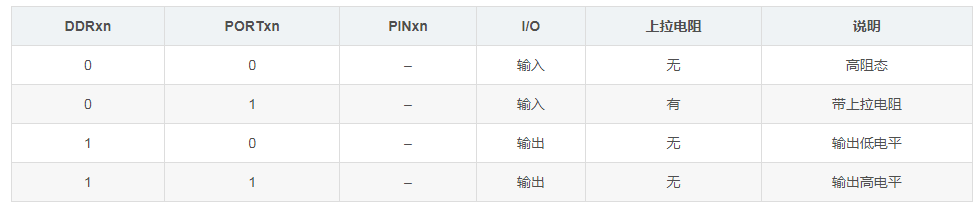
DDRxn PORTxn PINxn I/O 上拉电阻 说明
0 0 – 输入 无 高阻态
0 1 – 输入 有 带上拉电阻
1 0 – 输出 无 输出低电平
1 1 – 输出 无 输出高电平
AVR单片机中对IO口进行操作之前需要进行相应的初始化设置,其设置步骤如下:
1 通过方向寄存器DDRx设置相应的端口为输入或者输出。
2 如果设置为输出的话,把需要输出的数据送往数据寄存器PORTx。如果设置为输入的话,从输入寄存器PINx中读取外部的输入值,同时可以通过设置PORTx来设置相应的引脚是否需要上拉电阻。
三、使用Atmel Studio点灯
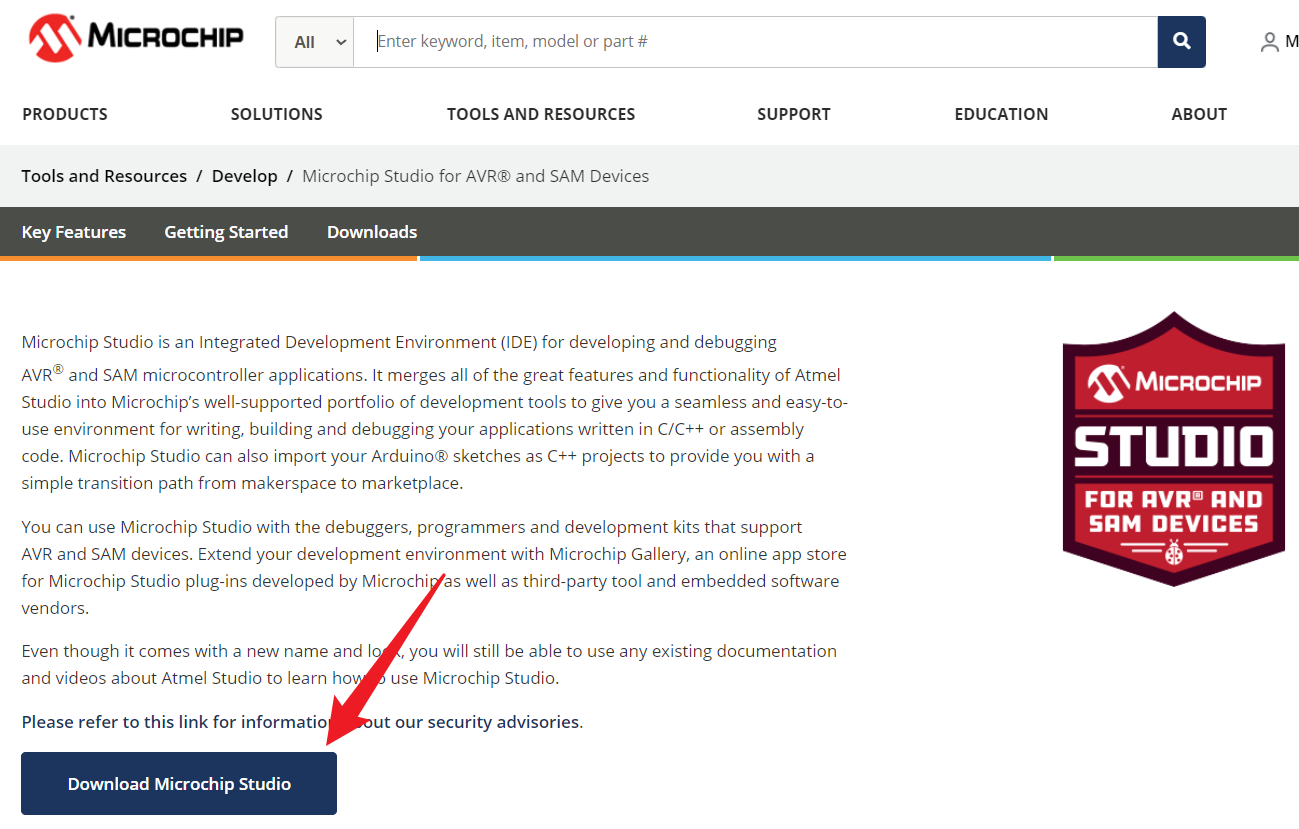
Atmel Studio是Atmel(现在是Microchip)公司推出的一款集成开发环境(IDE),专门用于嵌入式系统的开发。提供了丰富的工具和功能,以支持Atmel微控制器的编程、调试和部署。Atmel Studio支持多种编译器,包括GCC和IAR编译器,可用于生成最优化的代码。支持多种编程语言,包括C、C++和汇编语言。开发者可以根据自己的需求选择最合适的编程语言来编写他们的应用程序。
首先在官网下载Atmel Studio的安装包,由于Atmel被Microchip收购了,所以Atmel Studio也更名为Microchip Studio,它整合了Atmel Studio的功能,并扩展支持了更多Microchip微控制器系列,包括PIC和dsPIC系列。Atmel Studio和Microchip Studio都是用于微控制器应用程序开发的IDE。Atmel Studio主要针对Atmel微控制器,而Microchip Studio则扩展了支持更多的Microchip微控制器系列。
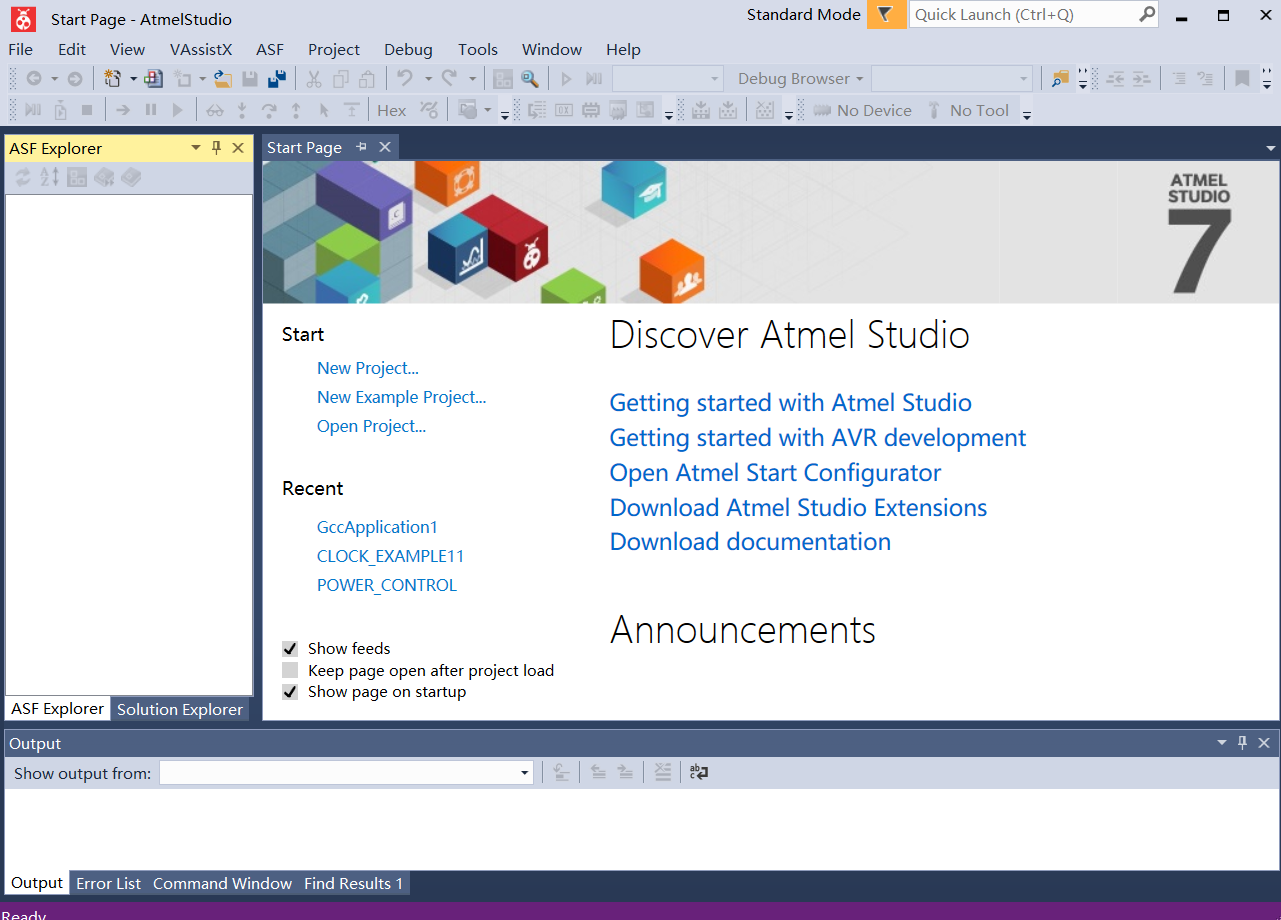
下载之后傻瓜式安装就可以了。安装完成的界面如下,看着是不是够很熟悉。Atmel Studio和Visual Studio在界面和功能上有很多相似之处,这是因为Atmel Studio是基于Visual Studio Shell开发的。它们的主要区别在于针对的目标平台和硬件。Atmel Studio专注于Atmel微控制器的开发,而Visual Studio是一个通用的开发环境,可用于各种应用程序的开发。因此,如果你已经熟悉Visual Studio,切换到Atmel Studio会相对容易,因为它们之间有很多共享的特性和工作流程。
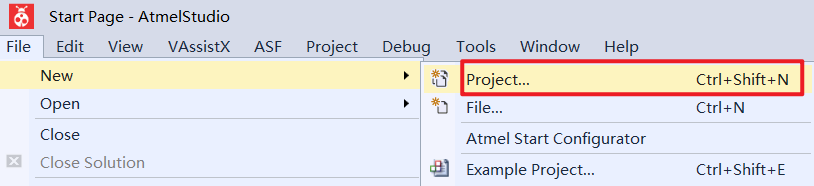
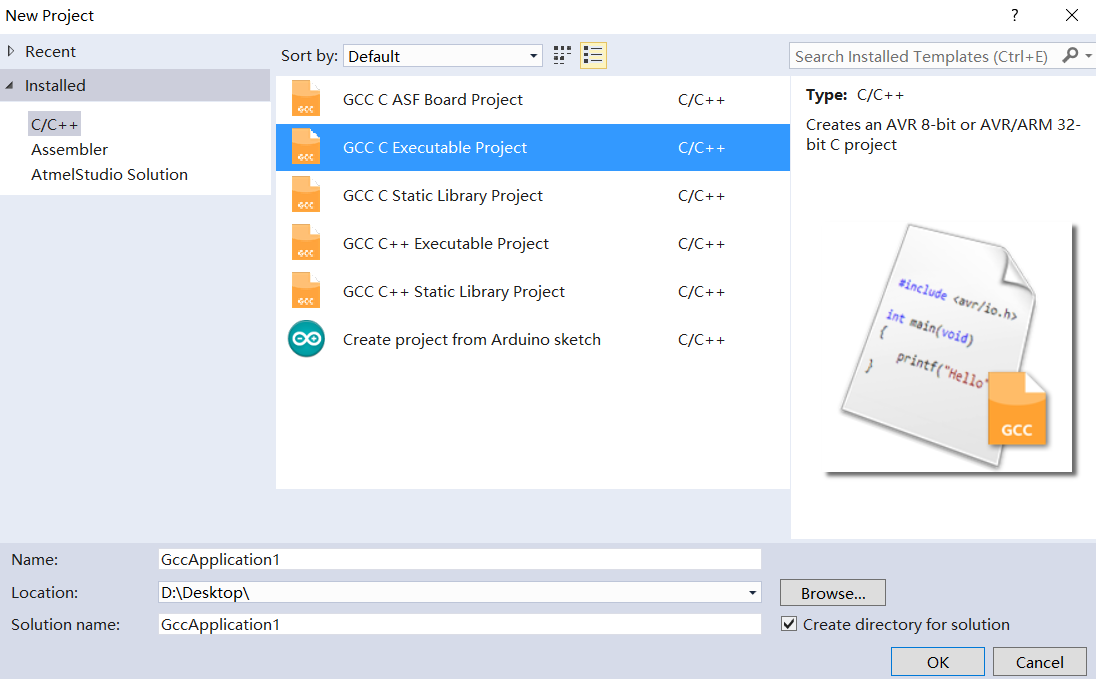
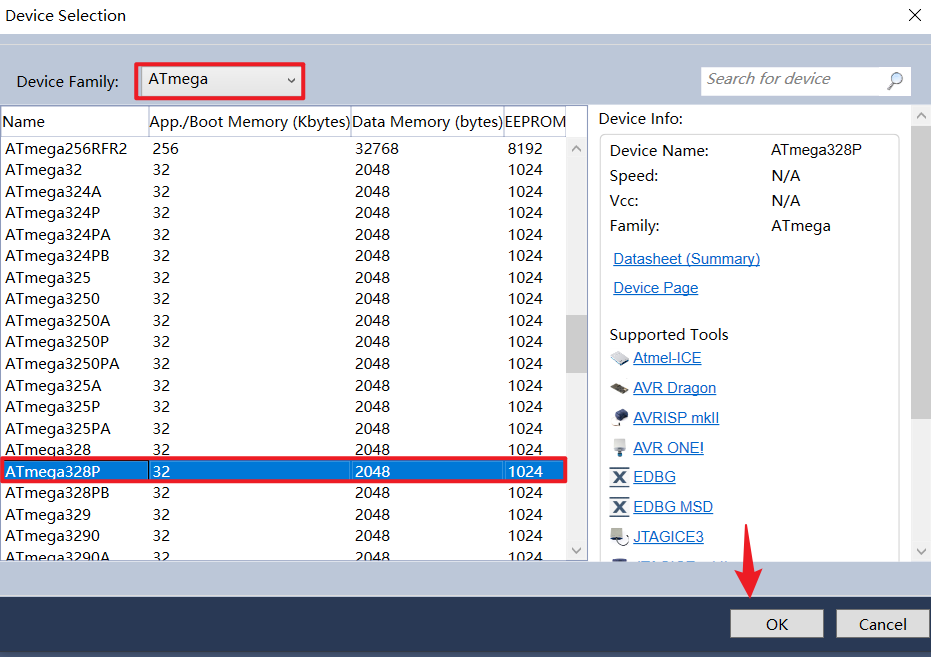
3.1 新建工程
/*
 * GccApplication1.c
 *
 * Created: 2023/5/18/星期三 14:48:19
 * Author : LiuYao
 * Board  : Arduino Nano
 */
#ifndef F_CPU
#define F_CPU 10000000UL
#endif

#include <avr/io.h>
#include <util/delay.h>

int main(void)
{
	DDRB =(1<<DDB5);
	/* Replace with your application code */
	while (1)
	{
		PORTB |=(1<<PORTB5);
		_delay_ms(1000);
		PORTB &= !(1<<PORTB5);
		_delay_ms(1000);
	}
	return 0;
}
3.2 工具配置
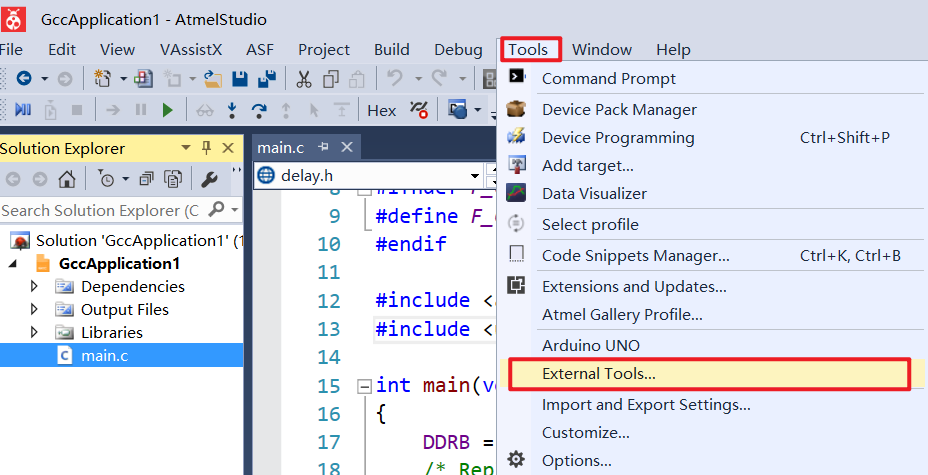
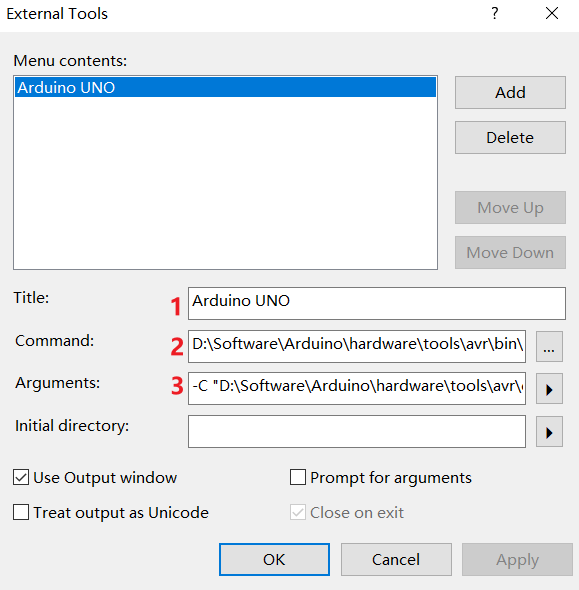
打开以后关键点是填写下面三个选项,同时需要勾选Use Output window。
Title:Arduino UNO(随意填写)
Command:D:\Software\Arduino\hardware\tools\avr\bin\avrdude.exe,这个路径为ArduinoIDE中avrdude.exe的路径,根据自己的路径填写。
Arguments:这里填写要注意串口号,我这里是COM7,根据自己板子识别填写正确的COM号。
-C "D:\Software\Arduino\hardware\tools\avr\etc\avrdude.conf" -v -p atmega328p -c arduino -P COM7 -b 115200 -D -U flash:w:"$(ProjectDir)Debug\$(TargetName).hex":i
Arguments参数解释如下:
Usage: avrdude.exe [options]
Options:
  -p <partno>                Required. Specify AVR device.
  -b <baudrate>              Override RS-232 baud rate.
  -B <bitclock>              Specify JTAG/STK500v2 bit clock period (us).
  -C <config-file>           Specify location of configuration file.
  -c <programmer>            Specify programmer type.
  -D                         Disable auto erase for flash memory
  -i <delay>                 ISP Clock Delay [in microseconds]
  -P <port>                  Specify connection port.
  -F                         Override invalid signature check.
  -e                         Perform a chip erase.
  -O                         Perform RC oscillator calibration (see AVR053).
  -U <memtype>:r|w|v:<filename>[:format]
                             Memory operation specification.
                             Multiple -U options are allowed, each request
                             is performed in the order specified.
  -n                         Do not write anything to the device.
  -V                         Do not verify.
  -u                         Disable safemode, default when running from a script.
  -s                         Silent safemode operation, will not ask you if
                             fuses should be changed back.
  -t                         Enter terminal mode.
  -E <exitspec>[,<exitspec>] List programmer exit specifications.
  -x <extended_param>        Pass <extended_param> to programmer.
  -y                         Count # erase cycles in EEPROM.
  -Y <number>                Initialize erase cycle # in EEPROM.
  -v                         Verbose output. -v -v for more.
  -q                         Quell progress output. -q -q for less.
  -l logfile                 Use logfile rather than stderr for diagnostics.
  -?                         Display this usage.
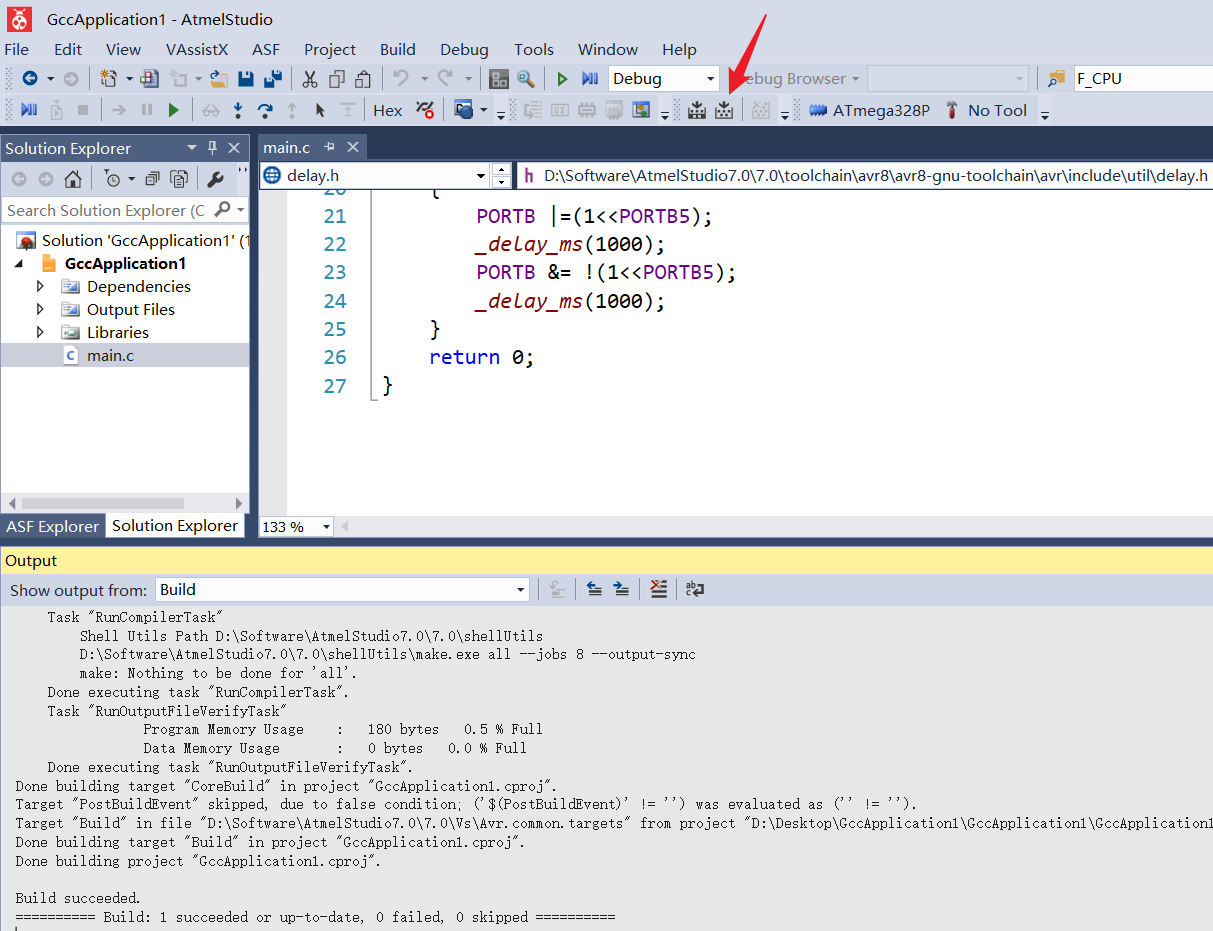
3.3 编译和烧写程序
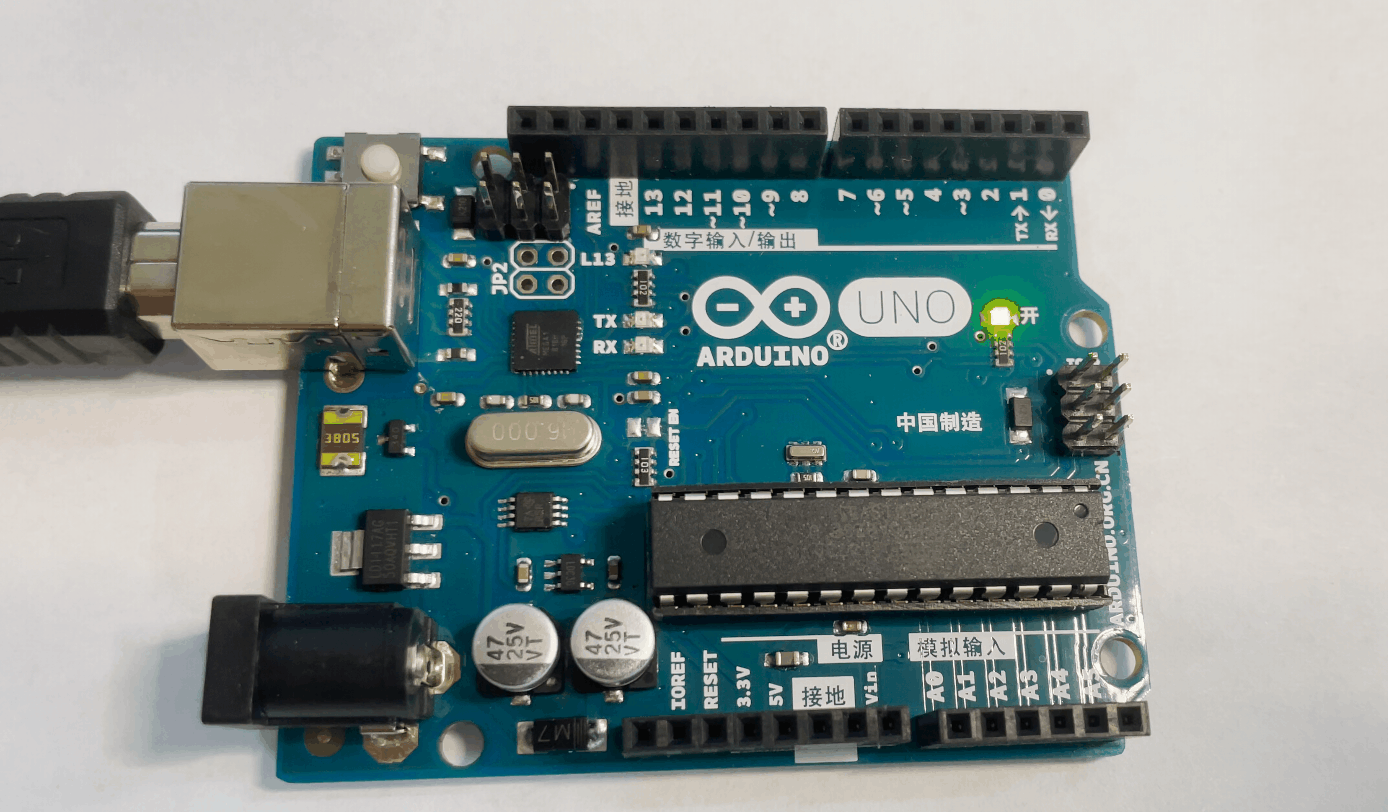
将Arduino UNO连接到电脑,去Tools中点击刚设置的配置Arduino UNO。
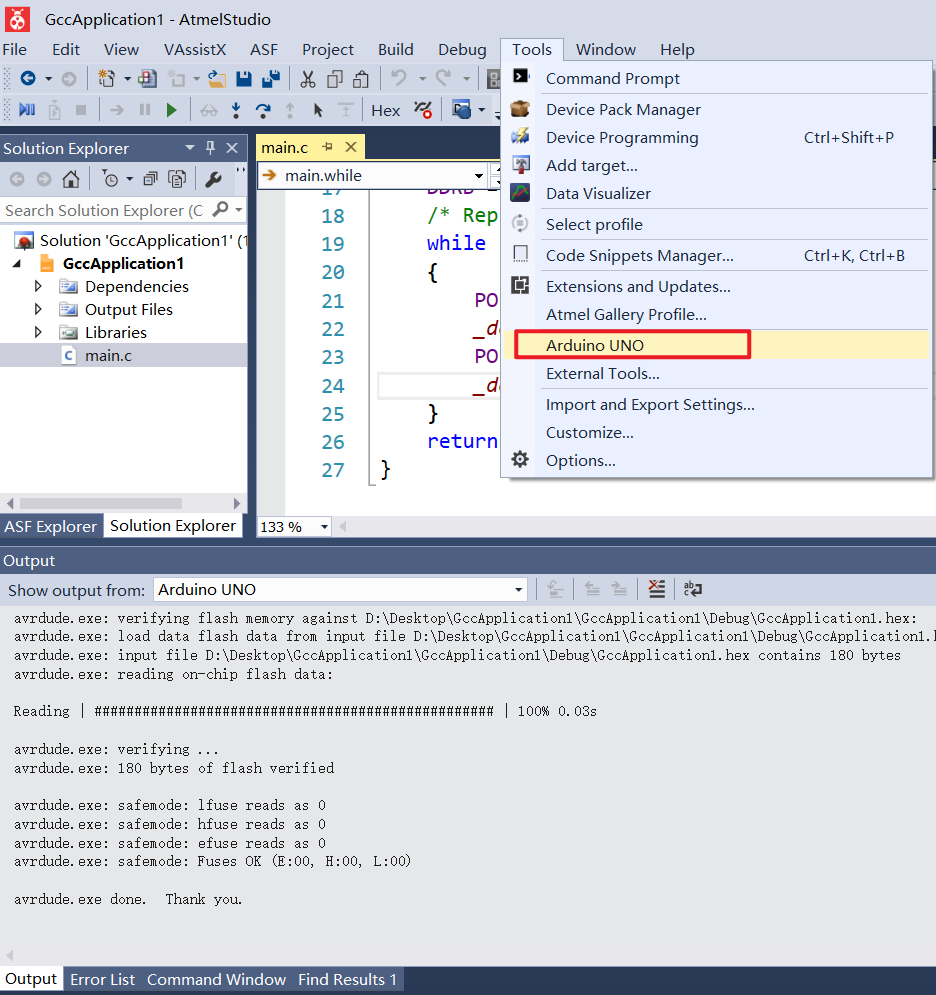
这个时候就可以把程序烧写到Arduino中了,output窗口会输出下面的内容。
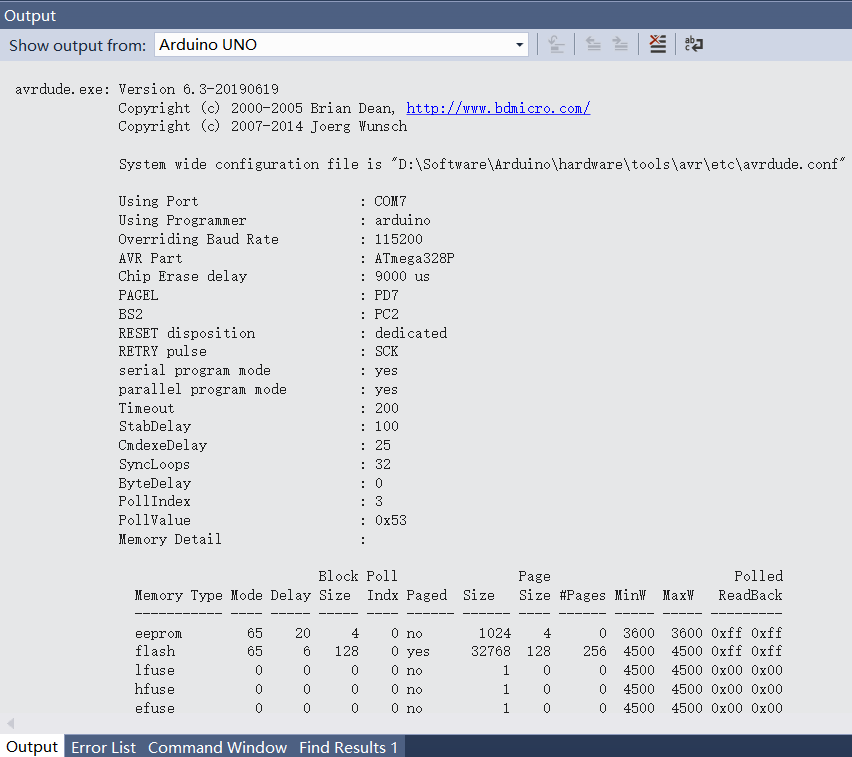
如果报错,需要考虑一下上面提到的路径是不是正确还有COM端口号。
注:通过Atmel Studio这个方式不能为Arduino Nano板子下载程序,因为Arduino Nano板子大多数用的是Old Bootloader,如果使用这种方式会下载失败。
试验现象
下次有人问你玩啥单片机时候你要说:我不玩Arduino,我玩AVR的,和你的ARM一样。
